Saturday, March 29, 2014

A Split-level Pergola

There's a curious berm in the side yard--I've always wondered about it. Compared with most of Florida this berm is more like a hill, a fledgling mountain that rises nearly three feet above a depression in the yard. Very odd. Why would this be? Possibly something is buried there? (This is Florida, after all.)

The little hill and valley is, coincidentally, the exact right spot for the new pergola. No other place in the side yard makes sense because this offers this best view from the back porch. It is meant to be. One option is to flatten everything out--chop off the hill and fill in the valley. But this means digging, and who knows what I might dig up? So I've decided to preserve the natural slope of the earth (not that I'm scared) and build a split-level pergola.

In between vacations and rainstorms, I've been able to set the concrete post anchors and a foundation for the pergola. These hexagonal pavers were used in the old walkway. Ugly. I'll cover them with flagstones when the pergola is done, and I'll make a flagstone walkway to the patio.


In any case, the pavers cover the top of the hill. Nothing is getting out of there now.

More rain today. I intended to cut out the rafter curves, but my plan to use a router did not work. Now everything is soaking wet. So I quit.


More about my failures later...


Monday, March 3, 2014

The Bridge: Drawboring the Hand Rails

I'm discussing this out of order because I want to remember--years from now when I am too old to do anything except read my blog posts--how I attached the rails for the bridge. The idea is called drawboring,

In case you've forgotten, old man Fred, you silly old man sitting there doing nothing, the hand rails were mortise and tenon (look it up). Yes, I'm talking to you.


You drilled some holes into the posts, and then you inserted the rail tenons into the post mortices and marked the locations with a pencil. Normally you'd just drill through the post and the tenon, but with drawboring you want the tenon hole to be slightly off center. This way, the dowels will pull the hand rails up tight when you push them through. Do you remember any of this? Probably not.


Of course, to do this you need to make the ends of the dowels come to a point so that they can slip into the off-center holes. It didn't always work and you broke some posts and had to start over and said some unpleasant things in the back yard. But it was a very nice day. If you can, why not get up and take a walk, you old turd?


Yesterday I finished the steps and added some ornamental touches on the sides. It is pretty much done. Now I just need to let the green wood of the bridge dry out so that it isn't so darn heavy. How many people will it take to move this thing?


Next: Moving on to a new project: the pergola!

Tuesday, February 25, 2014

The Bridge: Making Post Caps

When working in the yard on a perfect winter day, it's important to have a nice environment, like in the shade of our giant bamboo, just next to the mango tree. Of course, I had to set this up on my own. My project manager couldn't care less about my workplace or my sense of well-being.


Home Depot sells 6x6 post caps for about $15 each. I can make them for nothing from the project's scrap lumber, saving us over $100. My manager wants to know how long will it take to make them.

Don't worry about it, I answer.


You can't buy pressure-treated molding from the store, so I cut my own trim pieces with my router. Is this an efficient use of time? Yes, it just takes a while. Go have some coffee and let me work.


The pieces can be wiggly, so I tape them together first then nail them to the bottom of the caps.


Jam takes a look and decides it was a good idea after all (and apparently it was even his idea). It's tough being the project manager.


Here are the caps roughly assembled.


Next: draw-boring the mortise and tenon joints of the handrails.

Sunday, February 16, 2014

The Bridge: Curving the Handrails

After finishing all the mortises and tenons I did a quick assembly of the hand rails. Not bad, but I want to have a curve in the rails so that it gives the appearance of a single piece of wood flowing through the posts. Time to string up my thin strap of wood and mark off the curve in pencil.


I really need a good band saw to these cuts. Instead I do a rough cut on the table saw and follow up with the belt sander. This is more like it.


But something isn't right. One of the end pieces is hanging off in a most ungraceful manner. I check the curve. Yes, it seems to be curving in the right place. My eye tells me otherwise.


I look at the other side and it seems OK. What gives?


I've got it on the floor now, trying to remove any visual cues that I might be getting from the background. Is it an illusion? Sometimes we have to trust our senses and do what feels right and what looks right instead of following the rules. Maybe I'll just cut it freestyle, like a painter drawing on a canvas...


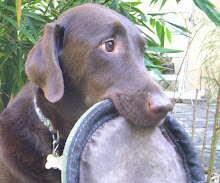
Not so fast. I take a break and go to my project manager who (I'm sure) suspects that I am lazy and looking for an excuse to quit working. He rests his head on my shoe, sighs heavily and pretends to listen while I theorize about perspective and symmetry and art. He could not possibly care less about the curve. Just do it, he thinks to himself.


Next: joining the two side, getting everything square...

Thursday, February 6, 2014

The Bridge: Hand Rails Done Wrong

I've decided to attach the hand rails using mortise and tenon joints, a decision that will prolong the project and test my resolve. Why not? Once my rough-cut piece of railing was ready, I pulled out my favorite chisel, sharpened it nicely on the wheel and then trimmed up the tenon end--that little tongue piece will stick into the post. Very nice.


Cutting the top part of the curve was easy on the table saw. The bottom curve is convex, though, and more difficult to cut. I tried using my jig saw, knowing that I should not (because the wood is too wet and thick), and the blade immediately wandered and ruined the piece, prompting me to put on a public display of self-loathing there in the driveway. Then I quit for the day.


That was Tuesday. On Wednesday I started again and with a better focus. The new piece looked pretty good, even the bottom curve, which I rough cut at an angle on the table saw.


Time to cut the mortise into the post. I marked it off. The post is now on the ground but on its side, still attached to the body. I need to disconnect the post so that I can put it on its back, hole facing up. Instead, I stubbornly smack the chisel from the side while using my shoe to absorb the blows. This will never ever work, not in a million years, but I persist because I don't want to take a few seconds to disconnect the post.


More frustrated now, I bring out my drill to make some pilot holes for the mortise--good idea. Of course I can't see well because the hole is on the ground and on its side instead of facing up. I'm in a bad state of mind. The drill bit snaps in two when I try to wriggle it free from the wet wood.


Jam looks away, embarrassed for me and for himself (because he is supposed to be keeping me grounded). Time to quit.


For two days in a row I lost my Zen, got in a hurry, knowingly did the wrong things, made stupid mistakes. Hopefully Jam will figure out how to keep me on the right path in the future.

Next: Cutting the mortise holes in a logical way. Becoming a better person.

Tuesday, February 4, 2014

Bridge: Attaching the Posts

Now that I have a nice curve at the bottom, I need to cut the posts and attach them, mindful that this bridge will be hovering over one of the most humid environments on earth, a fish pond in Florida. Any bolts and screws that I use will need to be completely weather resistant.

I considered making the bridge completely out of wood, all tongue and groove joints, put together like the ancient Japanese gardener/carpenters did it. But that would take months and months. And I am not worthy, Sensei (deep bow here).

So I got some expensive stainless-steel bolts and nuts. The rust will eventually get to them, but it will get to me first.


By spacing some small nails evenly from the top and bending a piece of molding around them I can quickly emulate the curve at the bottom. Will it be beautiful? Yes, if beauty = symmetry, considering that symmetry is the best that we non-artists can ever hope to achieve. (More humble bowing here--I am truly not worthy.)


The post will have pretty caps on top, but for now they are distinctly ugly.


Next: attaching the rails with tongue and groove (deep bow again)